Plugin Documentation
Plugin settings page
reCAPTCHA in WP comments form plugin works automatically so that, you only need enter your Google reCAPTCHA API key pair and set the plugin activation to ON however, the plugin settings page also allows you to configure more accurately the behaviour of reCAPTCHA in WP comments form.
The plugin settings page has got three big Areas that give you all information about the plugin.
- Status
- It shows the general information about the plugin, if it’s active, if the plugin can connect with Google verification site and a small status and instructions message.
- Configuration
- It is a five accordion metaboxes group where you can configure completely all aspects of the plugin and the reCAPTCHA field. See the next section.
- Example
- It shows an example of how you’ll see the reCAPTCHA field inside a standard WP comments form. If you change the theme, size, type, etc. of the reCAPTCHA field in the Configuration Area (2), after saving settings you’ll see the new reCAPTCHA field look.

Configuration Area
The configuration of this plugin is very simple, just a few settings divided into 5 accordion metaboxes.
- Plugin Activation
- reCAPTCHA API Keys
- reCAPTCHA Customizer
- Antispam Settings
- Plugin Settings
- Output screen Settings
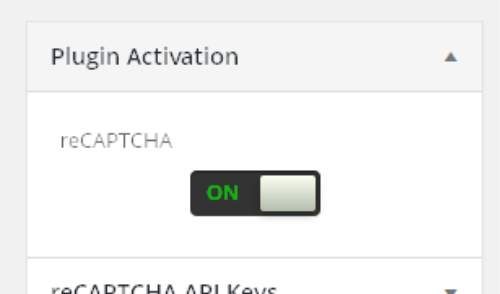
Plugin Activation
Plugin Activation accordion metabox consists of just one switch field that allows you to active and deactivate the plugin. This field, called simply reCAPTCHA, works globally and it’s completely independent of the rest of the settings. If you set this field as OFF, when you save settings the plugin will be deactivated immediately.
reCAPTCHA API Keys
reCAPTCHA API Keys accordion metabox contains just two text fields (Site Key and Secret Key) where you must introduce the Google reCAPTCHA API key pair that you’ll obtain visiting the Google reCAPTCHA admin page.
After introducing the API Key pair, save settings and, in the Status Area (1), check if the field Operation says Connected. If Operation doesn’t says connected, see the Message field instructions and check the API Key pair again.

reCAPTCHA Customizer
In this accordion area you can configure the internal settings of the Google reCAPTCHA field so, reCAPTCHA Customizer accordion metabox consists of a group of fields that control the look of the reCAPTCHA field. If you make changes in these fields, you can see the result in the Example Area (3) after saving settings.
The last field, Language, allows you to configure the language what reCAPTCHA field speaks in. Its first option, User Browser language, is the default option, the second one, Site language, sets the reCAPTCHA language to the Website Language. The rest of options set reCAPTCHA field to a specific language. The list of available langueges depends on Google reCAPTCHA field.

In the next image you can see different example of Google reCAPTCHA screen output when you change its settings in reCAPTCHA customizer accordion section.

Antispam Settings
Spam Robots normaly don’t use the WP comments form but they try to connect directly with the WP comments system for these cases the plugin adds a second verification process that detects this kind of unauthorized accesses.
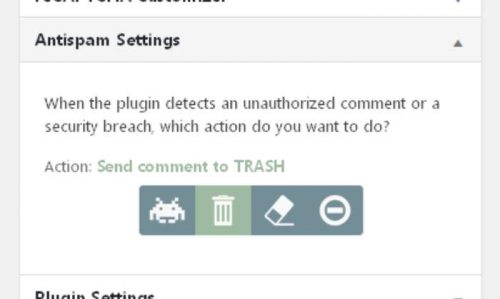
In this accordion section you can configure what you want to do with the comments that come from these unauthorized accesses. You can
- MARK these comments as SPAM,
- SEND them to the TRASH,
- DELETE them directly or even,
- BLOCK this access executing a
WP_DIE()function.
Plugin Settings
In this accordion area you can configure the internal settings of the plugin so, Plugin Settings accordion metabox consists of three groups of fields that allow you to control more accurately how the plugin works and to adapt its internal modules for a correct interaction with all kinds of WP themes. There are three subsections.
- Position for reCAPTCHA
- HTML container for reCAPTCHA
- CSS for reCAPTCHA

1.- Position for reCAPTCHA
To introduce the Google reCAPTCHA plugin in the correct place basically, we must to locate two HTML elements: a) the <FORM> tag and b) the Submit button however, the operation of locating these two element depends on the HTML structure of the comments form of the active WP theme.
Therefore, before changing the select field of this subsection -the HTML structures type selector-, please, first check you the HTML code of the comments form of your WP Theme to find out what type of HTML structure its form has got.
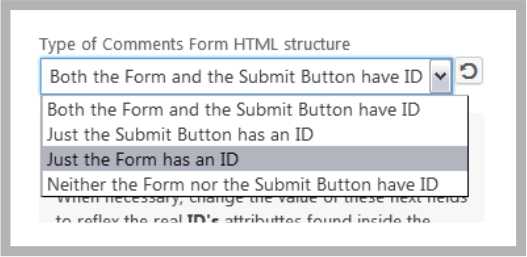
Choosing correctly the structure of the code of your comments form it’s important because each HTML structure forces the plugin for using different locating methods so that, when you change the this select field, the plugin will work internally in different ways and consecuently it will appear different data fields in the next grey box to support the locating methods you’ve chosen. There are four HTML structure types:
- Both the Form and the Submit Button have ID.
- Just the Submit Button has an ID.
- Just the Form has an ID.
- Neither the Form nor the Submit Button have ID.


And as I said it, each HTML structure type forces the plugin to work internally using different locating methods. There are two locating method: the first one based on the ID attribute and the second on based on a javascript DOM query string.
About JavaScript DOM elements location methods
The first locating method is based on the javascript function document.getElementById(id) that receives one parameter, the html ID attribute of the DOM object to locate, and returns the element that matches with the ID.
// For this HTML page example
    ...
    <body>
        <span id="my-test">This is a text</span>
        <div id="not-my-test">This is a text</div>
        <p id="not-not-my-test">This is a text</p>
   </body>
</html>
The ID parameter, from the plugin settings section, is used to locate the position of a DOM node Element near of which Google reCAPTCHA plugin will be inserted, See next example.
// The JavaScript Example
<script type="text/javascript" >
var NodeElement;

NodeElement = document.getElementByID ( 'my-test' );
console.log ( NodeElement ); // output => <span id="my-test">This is a text</span>

NodeElement = document.getElementByID ( 'not-not-my-test' );
console.log ( NodeElement ); // output => <p id="not-not-my-test">This is a text</p>

</script>
The second locating method is based on javascript function parentNode.querySelectorAll(selectors) that also receives one parameter, a standard javascript DOM query string -selectors-, and returns a list of all DOM elements that match with the “query string” so, as this function returns a list, we need a second parameter to determine which element of the results list we want to locate, the first one -0-, the second one -1-, and so on.
// For this HTML page example
    ...
    <body>
        <div class="related-content">
           <span class="my-test">This is a text 1</span> // this will be the FIRST: 0
           <span class="my-test">This is a text 2</span> // this will be SECOND: 1
        </div>
        <span class="my-test">This is a text 3</span>
    </body>
</html>
The ‘JavaScript Query String’ and ‘Position in query results’ parameters, from the plugin settings section, are used respectively to locate a group of DOM mode elements and to decide which element in results we ‘ll use as a guide near of which the plugin’ll insert the Google reCAPTCHA, See next example (example 4).
// The JavaScript Example
<script type="text/javascript" >
var NodeElements;

// Query example 1 (A query returns always a collection, even a collection of one, never a node directly)
NodeElements = document.querySelectorAll( 'span' ); // all 'span' elements in the code
console.log ( NodeElements );
/*** output =>
(NodeList) {
    0: (NodeElement) <span id="my-test">This is a text 1</span>,
    1: (NodeElement) <span id="my-test">This is a text 2</span>,
    2: (NodeElement) <span id="my-test">This is a text 3</span>,
} */

// Query example 2 and 3 (two different queries can return the same results)
NodeElements = document.querySelectorAll( 'div > span' ); // all 'span' elements inside the div
console.log ( NodeElements );
/* output =>
(NodeList) {
    0: (NodeElement) <span id="my-test">This is a text 1</span>,
    1: (NodeElement) <span id="my-test">This is a text 2</span>,
} */

NodeElements = document.querySelectorAll( '.related-content span' ); // all 'span' elements inside the div using 'class'
console.log ( NodeElements );
/* output =>
(NodeList) {
   0: (NodeElement) <span id="my-test">This is a text 1</span>,
   1: (NodeElement) <span id="my-test">This is a text 2</span>,
} */

// Query example 4 (With the first plugin parameter we get a collection
// and with the second one we select one element in the results)
NodeElements = document.querySelectorAll( '.related-content span' ); // elements inside the div using 'class'.
console.log ( NodeElements[0] ); // output => (NodeElement) <span id="my-test">This is a text 1</span>

</script>
Therefore, depending on the HTML structure type of the comments form the plugin will choose a different locating method and in consecuence, the plugin will use different field parameters.
- Both the Form and the Submit Button have ID. Then you have to introduce just the two ID’s of the HTML elements in the plugin settings fields. We just use the first locating method.
- Just the Submit Button has an ID. Then you have to introduce the Submit Button ID’s of the HTML element and a javascript query string for the <FORM> node element (for example,
#respond form, or#comments form, or*[method="post"], etc.) and tipically, we should choose the first element of the query results list so, the field position must be0. We are using both locating methods. - Just the Form has an ID. Then you have to introduce the <FORM> node element ID’s and a javascript query string for the Submit Button node element (for example,
#commentsform p[type="submit"]or#respond buttonor#comments *[type="submit"], etc.) and tipically, we should choose the first element of the query results list so, the field position must be0. - Neither the Form nor the Submit Button have ID. Then you have to introduce two javascript query string for both the <FORM> and the Submit button. See precedent examples.
2.- HTML container for reCAPTCHA
The field HTML container for reCAPTCHA allows you to choose the HTML tag will contain the reCAPTCHA field. You can choose among <p>, <div> or <p> as a container.
3.- CSS for reCAPTCHA
Finally, the field reCAPTCHA container CSS allows you to write a set of specific CSS rules for the reCAPTCHA HTML container tag. Perhaps you prefer to define the HTML container as a inline-block, perhaps you want to add some margins margin: 2em 3e..., etc.
All these fields have got a Restore Default Values button that help you in case of testing new configurations, lost of the original values, etc.
Output screen Settings
Finally, the Output screen Settings accordion metabox has just two switch fields that controls the code output method of the plugin to the screen.
The first one, Forced javascript output, is the key for doing reCAPTCHA in WP comments form plugin compatible with most of the WP themes, the newest ones but also the oldest ones.
Modern WP themes works through the WP function comment_form() so, the default output mode of the plugin (switch in OFF) also uses this function for showing the reCAPTCHA field however, if you are using an old (or special) WP theme that didn’t use this function for creating the comments form, you can set this switch field to ON and then the code output of the reCAPTCHA field will be executed via javascript instead of using the modern default functions.
On the other hand, javascript output mode is not infallible –it could fail– so that, if you detect a new incompatibility and the plugin doesn’t apparently work, please, don’t directly discard the plugin but that, for the contrary, I would be very grateful if you send me a message with details of the error and so I will able to improve even more the compatibility mode. Thank’s in advance.

The second switch, Credit Link, serves to add a little download plugin link below the Google reCAPTCHA field. Feel free to activated it if you like this plugin and you want to help it to continue and improve. Thank’s in advance.
Install Now
DemoDownload NowWordPress plugin pageImprove your themes, install now reCAPTCHA in WP comments form.